How To Add Schema And Rich Snippets In WordPress


Have you ever seen those Google search listings with the fancy stars or pictures?
You know, the ones that really grab your attention when you’re scrolling through the search results?
They can look like this:

Or sometimes they look like this:
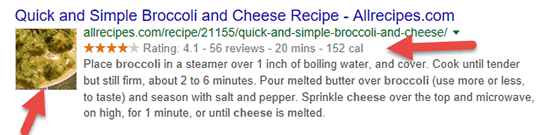
The websites with those juicy eye-magnets aren’t exploiting some loophole in Google. They’re using a very transparent method called schema markup to generate rich snippets (AKA the fanciness!).
If you want to make your content stand out in the same way, I’m going to teach you exactly how to get those same details added to the search results listings for your WordPress site.
What are schema and rich snippets?
Schema and rich snippets are closely tied, but slightly different, things. Essentially, schema markup, or structured data markup as Google calls it, is behind-the-scenes code that makes it easier for search engines to understand the context and structure of your content. This markup style is maintained at schema.org, which is sponsored by Google, Bing, Yahoo and Yandex.
For example, schema markup can tell search engines that that number is a 5-star review rating and that other number is the price of an item in USD.
As smart as search engines have become, they still benefit from being able to rely on these contextual clues when parsing your content.
So, after Google or another search crawls your site that’s marked up with schema, search engines can use that data to create the rich snippets that humans actually see in the search results.
These rich snippets will depend on your exact content. For reviews, they’ll include star ratings, for eCommerce products they’ll include prices and availability, and so on.
If you want an easy way to remember the difference, think of it like this:
- Schema markup is for search robots
- Rich snippets are for humans
But to get to the humans, you have to talk to the robots first!
Benefits of schema and rich snippets
Ok, just from your own experiences, you probably realize how attention-grabbing rich snippets are. But, singular experiences don’t always tell the full story. So what does the data say?
Search Engine Land put together a great list of case studies looking at the effect of implementing schema/structured data markup. You can dig into the individual studies, but generally, people have noticed up to a 30% increase in organic CTR after implementing schema markup.
It’s not just about CTR, either. The rich snippets generated from your schema markup can also:
- Help searchers understand your content better by adding breadcrumbs
- Give your content a chance to show up in Google’s Knowledge Graph (those big automated summaries at the top of some search results!)
- Add a site search box below your listing
- Ensure your business listing details are correct, which is especially important for local SEO
All that aside, schema markup is just plain smart. It makes it easier for search engines to parse your content, which should always be something you’re striving towards. And with Google and all the other major search engines pushing for its adoption, you can be sure it’s not going away anytime soon.
Now that you know the what and the why, let’s get into the how.
First, I’ll show you how using a premium plugin called Schema Pro. This plugin has one of the slickest implementations of schema markup that you’ll find and it supports 13 different types of schema markup, including reviews, recipes, articles, and more.
Then, I’ll also give you a second tutorial using a free plugin called All in One Schema.org Rich Snippets. This second plugin is still fairly flexible, but it will add a “summary” box to your content that all your visitors will see, which isn’t always ideal.
At the end of this post, I’ll also dig a bit more into the question of which rich snippets plugin you should choose for your site.
How to add schema markup to WordPress with Schema Pro
Schema Pro is a premium plugin from Brainstorm Force that manages to do what most other schema plugins can’t:
It lets you add schema markup to your content without forcing you to add a new content box on the front-end. That is, most plugins, including the second plugin that I’ll share in this post, add some type of box on the front-end with new content.
Schema Pro, on the other hand, lets you also add schema markup to your existing content, which saves you from displaying what is sometimes an ugly box. It also uses the JSON-LD structured data format that Google recommends.
Configuring Schema Pro
Once you install and activate the Schema Pro plugin, you can configure its basic settings using the included setup wizard. To access the wizard, go to Settings → Schema Pro → Configuration and click the Start setup wizard button:
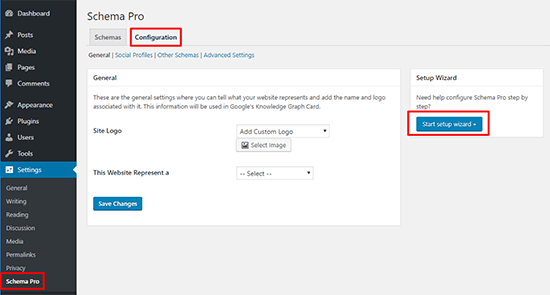
That should launch the setup wizard interface. Just click Start again to begin working through the wizard.
Note – some of the settings that you’ll configure in this wizard overlap with SEO plugins like Yoast SEO. If Schema Pro detects any overlap, it will give you an option to disable some of these settings. You won’t see this in the screenshots below – just be aware that it might happen to you and that’s totally fine!
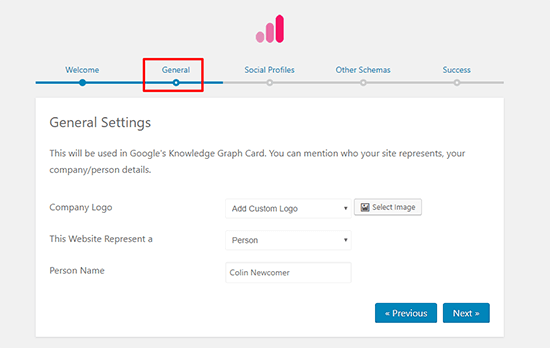
In the General tab, you can add basic information for Google’s Knowledge Graph, like a logo and what type of entity your website represents:
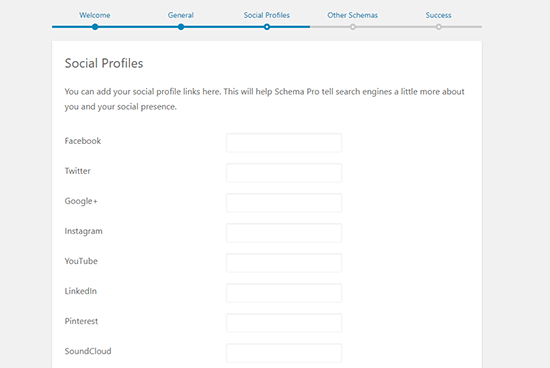
In the Social Profiles tab, you can include your profiles if desired:
And then the Other Schemas tab lets you set up breadcrumbs, sitelinks, and some other markup. You can hover over the question mark icon if any of the settings are confusing – but generally, you’ll want to enable all of these and select the relevant pages/menus:
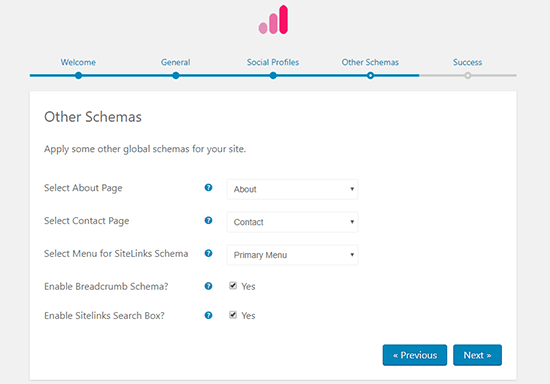
Once you click Next, you should see a success page, as well as an option to create your first schema.
Adding schema markup to content with Schema Pro
The setup wizard above configured all of your basic site schema, but you still haven’t added schema markup to your actual posts, pages, and other content. That’s what you’ll do now!
Here’s how it works. You’ll:
- Choose what type of schema markup you want to use
- Configure what pieces of content you want to apply the schema markup to
- Tell Schema Pro how to “map” the schema markup for that type to your existing content
Then, Schema Pro will automatically apply the schema markup to all the pieces of content that meet the conditions you set.
Yeah – I know that might sound a little bit confusing. But it’s really not that bad and Schema Pro does most of the work for you. For everything else, I’ll do my best to make it as simple as possible!
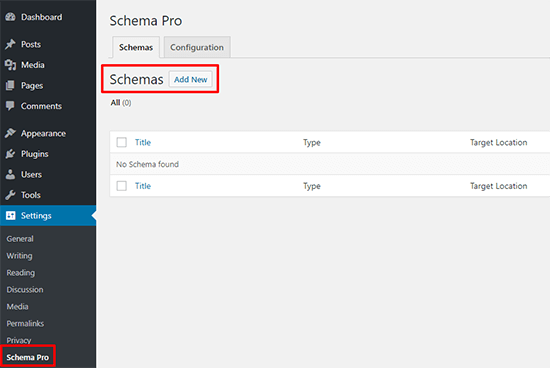
To create your first schema markup, go to Settings → Schema Pro and click Add New next to Schemas:
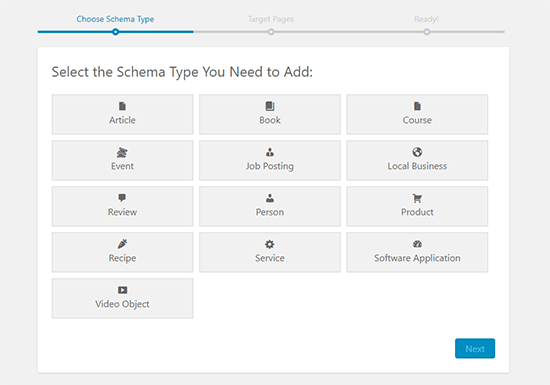
The first thing that you’ll need to select is what type of schema to add. Again, you have 13 different options.
If you just want to add schema markup for regular blog posts, you’d choose the Article option (that’s what I’ll use for the example). But feel free to use whichever type best applies to your site:
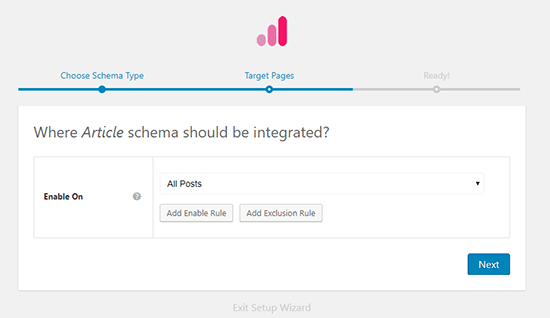
On the next screen, you specify where you want Schema Pro to apply the schema markup. You can either target:
- All posts, pages, etc.
- Individual posts or pages (helpful if you just have one post you need to apply specific schema markup to)
Note how you can use both Enable or Exclusion rules for more fine-tuned targeting.
For this example, it probably makes sense to apply the Article markup to all blog posts, so you would choose All Posts from the drop-down:
When you click Next, Schema Pro will give you a success page. Click the Complete Setup button to continue.
Now, it’s time for the last step. After you click Complete Setup, you’ll see a screen with a bunch of drop-downs. This is where you can map the schema data in the Article type to the data on your WordPress site.
Schema Pro will try to fill out as much of this as possible. For options that Schema Pro can’t figure out, you can use the drop-down to select existing content. Or, you can use the New Custom Field option to have Schema Pro add a meta box in the WordPress Editor.
Let me try to make that clearer with a real example. Look at this screenshot:
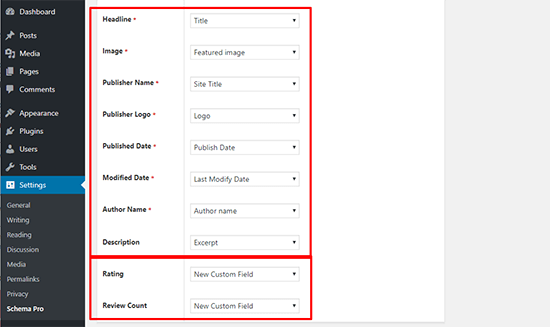
In the example above, Schema Pro will:
- Use your existing content for schema markup for everything in the first box. That is, it will pull the Author Name data from the WordPress post author, the Headline from the WordPress post title, etc.
- Add new meta boxes for the Rating and Review Count You can then manually enter this data in the WordPress Editor for each post.
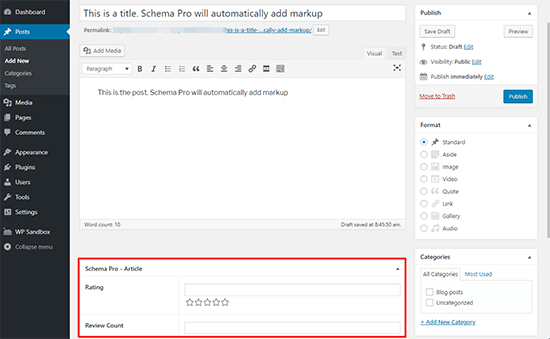
Now, when you go to the WordPress Editor, you’ll see the new meta boxes for those two options, and Schema Pro will automatically handle everything else for you:
And that’s it! Once you get the hang of it, Schema Pro really is the most flexible way to add schema markup to WordPress that I’ve found.
Note: As of September 2019, we now have to specify the type of review schema we are adding. For example, if we were to review a product like a laptop, we would need to select product as the type of review schema.
How to add schema markup with All In One Schema.org Rich Snippets
If you don’t like the idea of having a review box on all of your content, All In One Schema.org Rich Snippets offers a more lightweight method to add schema markup to your WordPress content. Instead of eye-catching review boxes, it adds an unobtrusive schema box to the end of posts.
All In One Schema.org Rich Snippets’ box isn’t really designed to offer detailed reviews or CTA buttons. Instead, it’s just there to follow Google’s requirement that sites display the marked up data to visitors.
Oh, and it’s also 100% free. That never hurts, right?
Currently, it supports 8 different schema content types:
- Review
- Event
- People
- Product
- Recipe
- Software Application
- Video
- Articles
Below, I’ll give you a quick tutorial on how you can use All In One Schema.org Rich Snippets to add schema markup to your site.
Configuring All In One Schema.org Rich Snippets
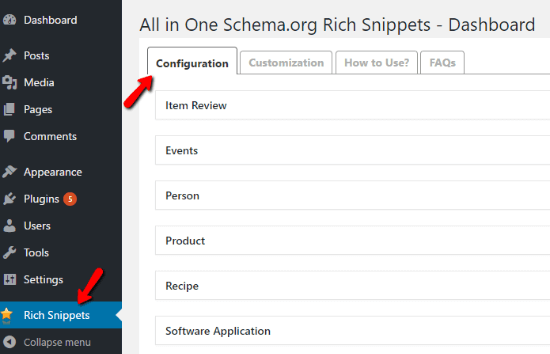
Because All In One Schema.org Rich Snippets is listed at WordPress.org, you can install it directly from your WordPress dashboard. Then, head to the new Rich Snippets tab to configure it.
In the Configuration tab, you can configure the various labels that display in your snippets boxes (this will make more sense in a second). You don’t need to change anything here unless you want to:
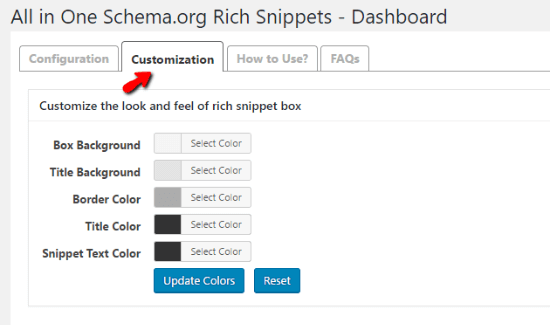
In the Customization box, you can also change the colors of your box:
And now you’re ready to add some schema markup!
Adding schema markup with All In One Schema.org Rich Snippets
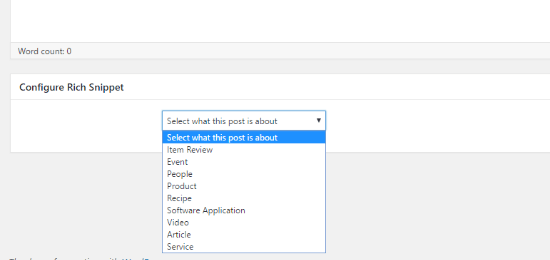
With All In One Schema.org, you’ll add your schema markup directly from the WordPress Editor. You’ll have a new Configure Rich Snippet meta box. If you want to add schema markup to your content, you just need to select the relevant schema type from the drop down:
For example, selecting Recipe will give you all of the boxes that apply to a recipe:
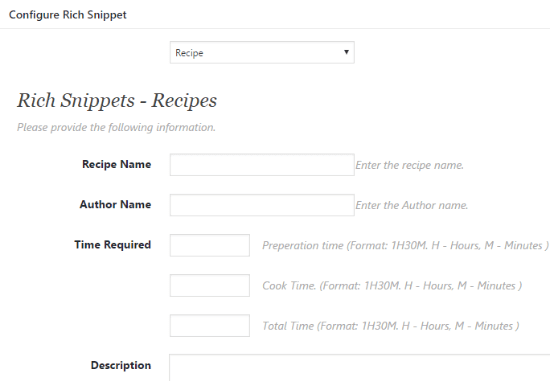
Fortunately, you don’t have to fill out every box. But make sure you give Google enough information for the rich snippet.
Then, when you publish your post, you’ll see a small rich snippet box at the end with all of your schema content and markup:

Important – Always validate your markup!
Here’s something to really pay attention to:
You should never just enable one of these plugins and automatically assume everything is perfect. You need to make sure your content is marked up right.
Thankfully, that’s super easy because Google created a tool to do exactly that.
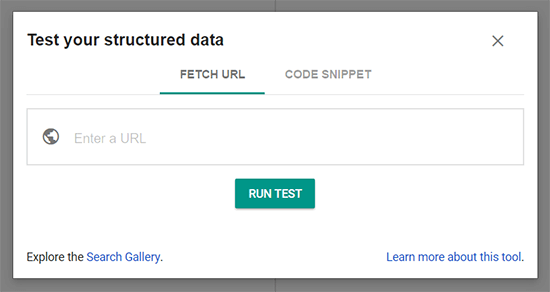
It’s called the Structured Data Testing Tool. All you need to do is enter your URL and hit RUN TEST to check if there are any issues with your schema markup:
Which schema markup plugin is better?
Overall, I think Schema Pro is the best rich snippets plugin for most sites because:
- It’s the most flexible plugin, though that does mean it might have a bit of a learning curve if you aren’t already familiar with the concept of custom fields.
- You can add Article Schema automatically which is a huge time saver.
- It doesn’t force you to add a horrible looking content box to your site.
So if you can swing the price and are willing to learn a little bit, it’s your best bet.
On the other hand, if you want something free and don’t mind adding a content box, All In One Schema.org Rich Snippets is a totally viable option (it’s actually from the same developer). The content boxes aren’t especially attractive, but they get the job done and the plugin is pretty easy to use.
Disclosure: Our content is reader-supported. If you click on certain links we may make a commission.